Tag Archive: IOT


ESP EASY IOT OS ON NODEMCU

Video :


ESP module can be turned into an IOT MULTIFUNCTION Sensor device by  installing  ESP EASY Firmware on to the module.

For HOME AUTOMATION projects it suits well and can be easily controlled from application servers like DOMOTICZ.

Configuration of the ESP EASY is entirely web based , so once the firmware is loaded , you just need a common web browser to work with.

Older version of ESP EASY is R120. Mega is the newer version.

https://github.com/letscontrolit/ESPEasy/releases

documentation :

https://espeasy.readthedocs.io/en/latest/


supported Hardware ESP modules :

https://www.letscontrolit.com/wiki/index.php?title=ESP_Hardware

The NodeMCU or WeMOS D1 mini are recommended , as they have inbuilt USB.

Sensors supported :

https://www.letscontrolit.com/wiki/index.php?title=Devices

Only the list of sensors are supported.You need not write any code separately for sensors.Just connect the Sensor and configure on Dash board. Display or control it from DOMOTICZ over HTTP or MQTT protocols.

Download the MEGA version of ESP EASY.

Under dist folder Flasher application is provided.Double click on that.

Image 1


Select the COM port where Nodemcu is connected.

Before selecting a .bin firmware file click on the update button.

Latest .bin files will be downloaded from Github repository.


Image 2

Select the relevant .bin file for your hardware.Here I’m selecting ESP8266 4MB version, as my hardware is NODEMCU with 4096 flash memory.

Test beta version supports Nextion display hardware.

Image 3

Setting of WIFI & fixed IP can be done later. For now Flash ESP EASY.

It takes approx 2 minutes to upload.


Image 5

Once uploaded , close the flasher and reset Nodemcu.

It starts in AP mode and the WI FI access point name is ESP_EASY.

Connect your PC to this AP using password  configesp

When a fresh ESP Easy module boots up, it has no Wifi config and it will start as an Access Point.

Use a Wifi enabled device (Laptop, Smartphone,..) to search for Wifi access and try to find an access point with the name ESP_Easy.

Connect to this access point with default password:

configesp


Image 6


Once connected , open your browser and type in ip address   192.168.4.1

You should get a  welcome screen:

Select your SSID and provide password.Click on CONNECT .

Now your NodeMcu connects with your SSID.

If the connection succeeded, you will see a screen, listing it’s new local IP address.

You can now reconnect your laptop or other device back to your private Wifi network.

Then click the “proceed” link to contact the ESP module on it’s private IP address:

Image 7

ESP EASY Nodemcu is offered an IP ADDRESS by your Router.

Use this address on a browser to access the DASHBOARD of ESP EASY.

Under MAIN tab is the SYSTEM INFO.

Image 8


Click on CONFIG tab.

Here you can change the AP password from configesp , if you need.

At the bottom is the IP Settings.

You can provide an IP address to make it STATIC.

The IP Address must be in the range of your Gateway IP.

Gateway IP is the IP of your ROUTER.When any client connects with the Router , it provides an IP address by its DHCP method.This IP will be in range of Gateway IP , only the last octet changes.

Finally click SUBMIT to effect changes.

Image 9

Next tab is CONTROLLERS tab.

Under this you select a PROTOCOL .

HTTP,MQTT,UDP all are supported.

In this demo we control an LED from browser commands.So select STANDALONE.


Image 10

Under HARDWARE tab you can set any GPIO pin to be High or Low on Boot up.

It is not needed in this demo , so we move on to next tab DEVICES.

Click on ADD from the list of devices.

Select SWITCH INPUT – SWITCH from the drop down.

Provide a name , like LED and then click the ENABLED .

Under GPIO , select GPIO 12 (D6) where we’ve connected an LED.

Click on SUBMIT.

Image 11

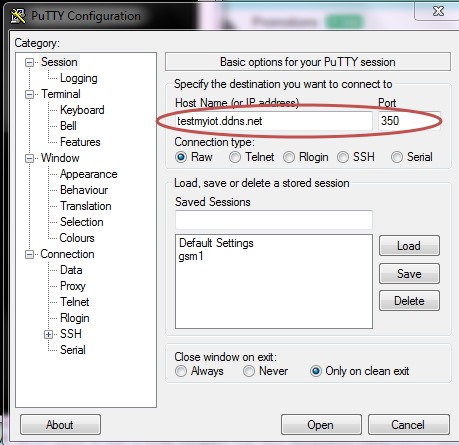
Now from your browser use this command to control LED.

Image 12


Image 13

Instead of GPIO you can use PWM to control brightness of LED.

gpio, pwm can be in small or capital letters.

Image 14


blog_image


title_iot2

This post is on Home Automation project where we control 2 devices from a mobile App. over Local Area Network.

NodeMCU with Arduino core installed is used with relay board.

You can watch this video on how to install Arduino core on NodeMCU.

https://www.youtube.com/watch?v=BbiLBiFvlsI

Android Mobile Application is developed using MIT APP INVENTOR , a WEB Application IDE.

https://appinventor.mit.edu/

For Arduino code we will use the one from my previous post

https://alselectro.wordpress.com/2017/11/08/nodemcu-arduino-core-2-led-on-off-from-webbrowser/

Download code for web browser LED On/Off HERE

This code is to control an LED from a Web browser on LAN.

We shall modify the code to work for Home Automation.

Arduino Code , Android App. (both .aia , .apk) files can be downloaded HERE

To start with connect a Red LED at D2 (which will be replaced with a DC Fan load)

A green LED at D4  ( will be replaced with CFL lamp AC Load)


I41

——————————————

#include <ESP8266WiFi.h>
#define FAN D2
#define LIGHT D4
const char* ssid = “Saravana”;
const char* password = “######”;

WiFiServer server(80);

void setup() {
Serial.begin(115200);
pinMode(FAN, OUTPUT);
pinMode(LIGHT, OUTPUT);
digitalWrite(FAN,HIGH);
digitalWrite(LIGHT,HIGH);

Serial.println();
Serial.println();
Serial.print(“Connecting to “);
Serial.println(ssid);
WiFi.begin(ssid, password);
while (WiFi.status() != WL_CONNECTED)
{
delay(500);
Serial.print(“.”);
}
Serial.println(“”);
Serial.println(“WiFi connected”);
server.begin();
Serial.println(“Server started”);
Serial.println(WiFi.localIP());
}

void loop() {
WiFiClient client = server.available();
if (!client) {
return;
}

Serial.println(“new client”);
while(!client.available())
{
delay(1);
}
String req = client.readStringUntil(‘\r’);
Serial.println(req);
client.flush();

if (req.indexOf(“/fanon”) != -1)
{

digitalWrite(FAN,LOW);
Serial.println(“FAN ON”);
}
else if(req.indexOf(“/fanoff”) != -1)
{
digitalWrite(FAN,HIGH);
Serial.println(“FAN OFF”);
}

if (req.indexOf(“/lighton”) != -1)
{
digitalWrite(LIGHT,LOW);
Serial.println(“LIGHT ON”);
}
else if(req.indexOf(“/lightoff”) != -1)
{
digitalWrite(LIGHT,HIGH);
Serial.println(“LIGHT OFF”);
}
String web = “HTTP/1.1 200 OK\r\nContent-Type: text/html\r\n\r\n”;

client.print(web);
}

————————————————-

upload the above code and open the serial monitor to note the IP address allotted to NodeMCU.

Note that all devices NODEMCU ,PC & mobile are connected to same Router.

The IP address allotted is DYNAMIC ,meaning , it may change on next power up.

To make it STATIC , you can set Address Reservation setting under Routers settings.

l3

Once the IP is allotted , open up the WEB browser and type in IP/fanon

for e.g  192.168.1.107/fanon

Initially both the LEDs will be ON .As we will use a LOW enabled input Relay board, these LEDs are made ON indicating the devices are OFF initially.

On sending the string fanon from browser , the RED LED will go OFF.

On sending 192.168.1.107/lightoff , the Green LED will go off.

Similarly  fanoff string will make Red LED ON , lightoff string will make Green LED ON.


Now the code is working perfectly, we shall replace the LEDs with actual devices to be controlled.

A 4 channel 5 volt Relay module is used to connect the actual devices .We use a DC FAN 5v at relay contact 1 and a CFL bulb AC at RELAY 4


I42

For power source a MB102 PSU board is used on MB102 Bread board.This board can be easily plugged on to MB102 Breadboard and has jumpers.One jumper (top)  is set to  5v and the bottom jumper set to 3.3v.

An external adapter of 9v 1amp is used .

I43

Connect IN1 of relay board to D2 of NODEMCU

IN4 to D4,  GND to GND.

I40

While connecting Load to relay board, always connect the power to load at POLE.

Actual Load is connected to NO Normally Open pin of relay contact.

While handling AC loads, take precaution to insulate relay board within a plastic box and do not touch the relay board.

It is safer to connect Neutral to POLE and AC Phase to other end of Load.

I45

Also remove the jumper on relay board.

Connect 3.3v to Vcc and 5v to JD-Vcc

This enables error free operation , as the NODEMCU is a 3.3v device.

jdvcc


Now let us develop our Android Mobile Application using on line MIT APP INVENTOR.


Image 3

Click on Start a New project and provide a Project name. Space and Hyphen not alloed in name , but underscore allowed.


Image 5

You will be presented with development screen which has 4 columns.

1st Column is Palette with all User Interfaces and components to build the App.

2nd Column is the actual Screen viewer.

3rd Column displays all the selected Components.

4th Column shows the Properties of the selected Components.

Image 6

From LAYOUT drag and drop a HORIZONTAL ARRANGEMENT

Image 7

Set the Height under properties to 10 percent , Width TO FILL PARENT

This is to provide space at top of screen.

Image 8

Then drag and drop LABEL from User Interface

Image 9

Set Width TO FILL PARENT , Text to Heading of App. , alignment center ,Fontsize to 25

and background color to yellow.

Image 10

Next drag and drop  TABLE ARRANGEMENT from LAYOUT.

Image 11

Set properties , COLUMNS to 3 and ROWS to 2,  Width to FILL PARENT, Height to Automatic.

2 Rows required for 2 device control.

3 columns  for image , on button and off button.


Image 12

Drag and drop an IMAGE component from User Interface.

Image 13

Under Properties set the Height to 15 percent, Width to 30 percent.

Under Picture property click Upload File and select the image to upload.

Image 14


Image 15

Now drag and drop 2 buttons next to image 1.

Image 16

Drag and drop another IMAGE component, below the first imge.

Set properties accordingly and upload the second image.

Drag and drop 2 more buttons as shown below.


Image 18

Select the properties of Buttons

You need to change the Text and the background COLOR.

Image 19

Next drag and drop a WEB component from CONNECTIVITY.

As this one is a Non Visible component , it will show up at the bottom of the screen.

Image 22

Now click on the BLOCKS button at the right top corner.

Image 23

Select Button1 from the left side Blocks.

You will see a list of options.

Select the When..Do ..Button..Click block.

Image 24

Next click on WEB .

Select the set..web1..url..to block

Image 25

Third block to select is under TEXT

Select an empty Text block for text.

Image 26

Finally from WEB

select  call..web..get   block.

Image 27

Following are the blocks we selected.

Image 28

Assemble the blocks as shown.Just drag and fix at the connecting points.

Image 29

Click on Text block and type in

http://192.168.1.5/fanon

Your IP may be different.Change the IP according to the one shown at serial monitor of

Arduino, after uploading code.

Image 30

The first block is ready.

Right click and select DUPLICATE.


Image 31

Change the Text for other blocks as shown.

Image 32

Now click on BUILD App TO SAVE .apk file to computer.

You can transfer this .apk file to mobile using SHAREIT or any application.

Image 34

Also you can export the .aia file.

.apk file is for Android mobile.

.aia file is the one you can import on your MIT APP and do the necessary modifications

and then finally generate your own .apk file.

Also you can install MIT AI2 Companion on mobile to view Real Time development.

By this application you can view the real time changes on mobile , as you develop

appplication on MIT APP Inventor.

Image 36

Now open the Application on mobile.

Touch on the buttons to see the project working.

IMG_20191219_132341

VIDEO TUTORIAL


blog_image

title_iot1

IOT is Internet Of Things where devices are connected over internet and made SMART.

These devices can be controlled from any where in the World or collect data from devices to process.

In this 1st post of IOT series I will introduce the hardware required to start with and also the IOT platforms used.

Arduino boards are much popular among hobbyists and developers.But these Arduino boards (UNO,MEGA) lack Ethernet or WIFI capability which is essential for IOT.

For wired connection there is ETHERNET Shield which can be plugged on directly to UNO or Mega.

l1


For internet access I’m using a Huawei make USB Dongle with a Data SIM inserted.This dongle

can be used in standalone mode , as it has got WIFI capability.But plugging this to a Router

like TP-LINK enhances its capability of WIFI Range, more Clients, Static IP setting,etc..

i3


i1


The Ethernet shield can be plugged on to Arduino and an Ethernet cable (straight type)

can be used to connect with the Router.

The Router will then allot an IP Address (local IP) to the ethernet shield which is now a client.

DHCP server of Router allots the IP on first come first basis.As this IP is DYNAMIC ,

the address may not be the same if powered off and connected again.’’

To make the IP address STATIC , the ROUTER has ADDRESS RESERVATION settings

under DHCP.

MAC address of the device is used to make the local IP STATIC.

l3

Instead of wired Ethernet connection you can go for WIFI Devices. ESP8266 WIFI modules are

cheap and popular now.

ESP8266 WIFI modules , a wide range available.ESP8266-01 module is basic model .As it is not breadboard friendly , you can make use of a base board to plug on , as shown in picture below.

ESP8266-12E module has more GPIO pins and memory.

These modules can communicate with ARDUINO using AT COMMANDS for ESP.


I6


To use ESP modules we need a controller like Arduino.

Easier option is to use NODEMCU Modules.These NODEMCU modules are built on ESP12E chip

and has USB to upload code.LUA is the official Firmware that comes with NODEMCU.

Using BOARDS MANAGER in Arduino IDE you can implement ARDUINO CORE on to NODEMCU

and start using NODEMCU individually.

You can check out my video on how to implement Arduino core on to NODEMCU.

https://www.youtube.com/watch?v=BbiLBiFvlsI

Once Arduino core implemented , you can use Arduino IDE and libraries to develop code on NODEMCU.

Latest arrival is ESP32 which is much more powerful than NODEMCU with more Analog pins

and with BLUETOOTH,BLE and inbuilt sensors.

I8

For IOT and HOME AUTOMATION projects RELAY BOARDS are helpful to connect wide

range  of Loads or devices.

5V Relay boards are available with 1 channel , 2, 4,8 Upto 16 channels .

Each relay is driven by an opto coupler and a NPN transistor.The relay contacts are

provided as Terminal connectors.

Each Relay has a  common POLE,  a NC –Normally Connected contact and a

NO – Normally Open contact.


I10

These 5V relay boards are LOW ENBLED, meaning , a LOW at input will energize the Relay.

A low at input will make the opto coupler conduct which drives the NPN Transistor.

This in turn will switch ON the relay.

jdvcc

Electronic solid state relay boards are also available which are called SSR.


SSR

12v Relay modules also are available.Here the relay is driven by a NPN transistor .12V Modules are HIGH ENABLED ,meaning, a HIGH at input drives the relay ON.


I11


Any load ,DC or AC can be connected to the RELAY contacts, irrespective of the supply voltage to relay board.

The power supply to load is connected to POLE pin and the actual load is connected to the NO pin.

As the relay is energized the pole pin changes from NC to NO ,thus activating  the Load.

While using AC load take precaution to insulate properly the wires as well as the Relay boar.Do not touch relay board with AC load.

I12


You can control the devices over Local Area Network or through Cloud or internet.

While using LAN , make sure that the NODEMCU and your mobile , both are connected to the same Router SSID.

For control over internet you need to PORT FORWARD the local ip device port on the router settings.But nowadays a number of IOT PLATFORMS are available as CLOUD. Though you need a paid subscription , most of them offer free service for hobbyists with some limitations.

BLYNK, CAYENNE, THINGSBOARD are some popular IOT PLATFORMS.

Sign in to any of these platforms and start controlling the devices from anywhere in the world.

iot2

VIDEO support :


blog_image

In the previous post PART 1  we explored the ways to make the local IP address of PC/ESP8266 STATIC.

In this part 2 we shall see how to make your Dynamic Public IP as STATIC using NO-IP account & then Port forward to the server started on port 350 of ESP.

PORT FORWARDING

First let us do the PORT FORWARD  settings.

For this , type in your Router’s Gateway IP in the browser & log in to Router’s Settings.Here my Router’s gateway is 192.168.1.1

The PORT Forwarding is done under VIRTUAL SERVER.

For different Router , you can check out this excellent link which guides settings for almost all types of Routers in the World.

https://portforward.com/router.htm

In my case the VIRTUAL SERVER is under ADVANCED —> NAT


image1

Under Virtual Server feed in the WAN & LAN ports as 350.

Under LAN IP feed in the static IP of our ESP8266.Here it is 192.168.1.10 which we made static as described in part 1.

Once the APPLY CHANGES button is clicked , the entry appears under Forwarding Table.

Image 2


WINDOWS FIREWALL SETTINGS


Next is the Windows firewall settings to allow communication through port 350.

Open Windows Firewall with Advanced Security.

Click on Inbound Rules & then New Rule.


Image 3


Select Rule Type as PORT.

protocol as TCP.


Image 4

Under Action select “Allow the Connection”

& tick mark all under the Profile.

Provide a Name for the Rule & save it.

Image 5


START SERVER ON ESP8266

Now open the Putty window where you’ve connected ESP8266 ( refer part 1 for details)

Before starting server , issue the command

AT+CIPMUX=1

Then start the server on port 350 using

AT+CIPSERVER=1,350

Image 111

Now the Server starts listening on PORT 350.


Convert Public IP to STATIC

The external world communicates with your ESP server using the Public IP of your Network.This IP is generally DYNAMIC which means it changes on every boot of your Router.

To make it STATIC we shall use a service called NO-IP which converts your public IP to a Domain name & follows the changes.

Visit www.noip.com

Sign up by providing your EMAIL.

Image 6

LOG IN  your NO-IP account.

Under Dynamic DNS click on ADD HOSTNAME.

Image 7

Enter the host name, for e.g , as   testmyiot  & from the dropdown select a domain , say, ddns.net.

Now your new host name is

testmyiot.ddns.net


Image 8

Next , click on Device Configuration Assistant.

Image 9


Under the dropdown select the host name we created , testmyiot.ddns.net


Image 10

Next step is to fill in the Device details.

Device type is SERVER

Device Brand is WEB SERVER

Router make – select your router name .If not found in list then select other

& then enter Router type as Home.

Image 12

On the Next window answer NO

We shall come back to this window shortly after setting the Router for NO-IP.

Image 13


On the next window , before clicking YES to log in device, go to the Router settings in browser where you typed in 192.168.1.1

Image 14


Click on SERVICE & then DDNS.

Most of the Routers support NO-IP & is listed on the drop down.

Select NO-IP

Image 15

Feed in the Host Name as testmyiot.ddns.net

Provide the email & password you used to create the NO-IP account.

Image 17

Click on ADD to save to DDNS Table of Router.

Now go back to your NO-IP account window.

Click YES to log in device.

Image 18

On next window click on TEST CONNECTION

Image 19

After a short time you should see SUCCESS.

Now you’re done with DDNS settings.You need not go further to Port forward tab, as we’ve already done it.

Image 20


Following is the procedure , in case your Router doesn’t support NO-IP .

If you do not see NO-IP under drop down of DDNS settings of Router,

go back to your NO-IP account & click YES to the question “Is there a computer always running on your Network?”.


Image 22


You’ll be taken to next window to download DUC.

DUC- Dynamic Update Client is a software which runs in the background of your PC to follow your public IP.

Download it & install.

Image 23

Before FINISH ensure to tick mark “Run DUC in the background”

Image 24

Now you’ll be asked to login your NO-IP account again

Image 25

Once you log in, the following windows appear.

Select the host name you created & click save.

Image 26

Now you can see all TICK marks in the DUC window.

DUC runs in the background & follows your public IP to the domain name you created.

Image 28


You can test the access to ESP server now from a distant PC.

From anywhere in the world , make open a PUTTY window.

Select RAW & feed in the host name testmyiot.ddns.net & port as 350.

Image 29

You get CONNECTED to the ESP server


Watch this demo video :


cooltext753793315   cooltext753790696


Image 2


Image 1


Introducing a new ESP8266 Development Board with an ESP-12, a 3x AA battery holder, a voltage regulator, an RGB LED, several red LEDs, and a light sensor LDR on the ADC input all on one board.

The board can be controlled by an open source Android App which is available from the AI-THINKER Website.

GPIO pins are extended with berg pins for easy external connections. RXD,TXD & GND pins are provided for programming / firmware upgrading. A yellow jumper is provided to pull GPIO0 pin to GND during programming. During normal operation this jumper must be removed.

The board is powered by 3 nos AA batteries , for which a battery box is already wired. On board 3.3v regulator is provided for a stable power supply.

No power switch or Reset switch is provided. To switch off you need to pull out one of the batteries.

The board comes pre-loaded with a demo which does actually seem to work.  If you have an Android based phone or tablet you can download AI-Thinker’s app to control and mix the color balance on the RGB LED and to switch the other LEDs on and off.

The Android Application can be downloaded from :

https://play.google.com/store/apps/details?id=com.duvallsoftware.iotdemoapp


There are also 6 red LEDs fixed with the necessary resistors connected to GPIO16, GPIO14, GPIO5, GPIO4, GPIO0 and GPIO2. A BLUE LED is always ON if the board is powered.

The GPIO13, GPIO12 and GPIO15 are connected to a RGB LED which allows you color mixing using PWM.

ADC

The analog-digital converter is also available on a pin & connected to a light resistor. This lets you quickly test the ADC and you still can clip the resistor off if you want to measure another analog source.Remember the range of ADC is max 1v & not 0 to 3.3v

If you don’t want to use the light sensor or the LEDs you can simply clip them off. Then you’ll just have an  ESP8266 with 3xAA power supply, 9 available GPIO pins and one ADC.

On the playstore of your Android device search for  IOT DEMO App & install it.

Open the Settings & enable WIFI of the Android phone.Now power on the ESP board to see the AI-THINKER SSID on your mobile.

PAIR this with the ESP board using password ai-thinker

Now open the app & touch on LED 1 to 6 , to see the corresponding light glowing on the ESP board.On the top you can see 3 icons with sliders in the App. Use this to mix colors on the 3 color LED of ESP board.

Once the functioning of board is verified , you can proceed to connect the GPIO pins of ESP board with a 4 channel Relay board.

The 4 channel relay board used requires a separate power source of 5V, 1amp.For demo 2 of the GPIO pins are connected to relay 1 & relay 3.The GND pins of both ESP & the Relay. board to be made common.

You can watch this video to learn the home automation basics with ESP board :


cooltext753793315    cooltext753790696