IOT is Internet Of Things where devices are connected over internet and made SMART.
These devices can be controlled from any where in the World or collect data from devices to process.
In this 1st post of IOT series I will introduce the hardware required to start with and also the IOT platforms used.
Arduino boards are much popular among hobbyists and developers.But these Arduino boards (UNO,MEGA) lack Ethernet or WIFI capability which is essential for IOT.
For wired connection there is ETHERNET Shield which can be plugged on directly to UNO or Mega.
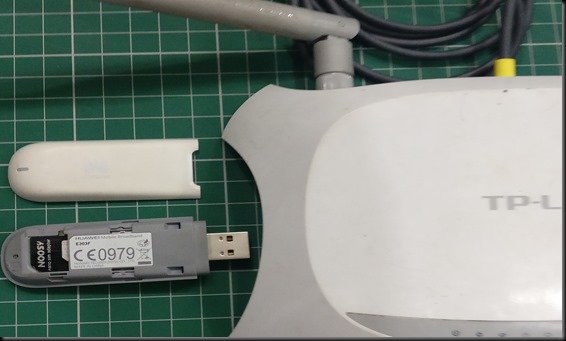
For internet access I’m using a Huawei make USB Dongle with a Data SIM inserted.This dongle
can be used in standalone mode , as it has got WIFI capability.But plugging this to a Router
like TP-LINK enhances its capability of WIFI Range, more Clients, Static IP setting,etc..
The Ethernet shield can be plugged on to Arduino and an Ethernet cable (straight type)
can be used to connect with the Router.
The Router will then allot an IP Address (local IP) to the ethernet shield which is now a client.
DHCP server of Router allots the IP on first come first basis.As this IP is DYNAMIC ,
the address may not be the same if powered off and connected again.’’
To make the IP address STATIC , the ROUTER has ADDRESS RESERVATION settings
under DHCP.
MAC address of the device is used to make the local IP STATIC.
Instead of wired Ethernet connection you can go for WIFI Devices. ESP8266 WIFI modules are
cheap and popular now.
ESP8266 WIFI modules , a wide range available.ESP8266-01 module is basic model .As it is not breadboard friendly , you can make use of a base board to plug on , as shown in picture below.
ESP8266-12E module has more GPIO pins and memory.
These modules can communicate with ARDUINO using AT COMMANDS for ESP.
To use ESP modules we need a controller like Arduino.
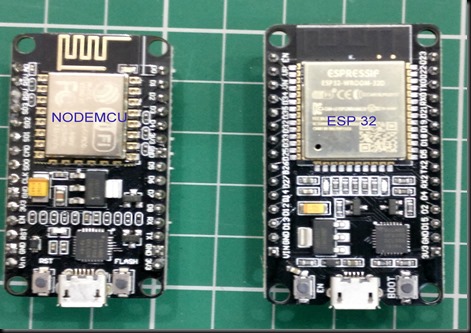
Easier option is to use NODEMCU Modules.These NODEMCU modules are built on ESP12E chip
and has USB to upload code.LUA is the official Firmware that comes with NODEMCU.
Using BOARDS MANAGER in Arduino IDE you can implement ARDUINO CORE on to NODEMCU
and start using NODEMCU individually.
You can check out my video on how to implement Arduino core on to NODEMCU.
https://www.youtube.com/watch?v=BbiLBiFvlsI
Once Arduino core implemented , you can use Arduino IDE and libraries to develop code on NODEMCU.
Latest arrival is ESP32 which is much more powerful than NODEMCU with more Analog pins
and with BLUETOOTH,BLE and inbuilt sensors.
For IOT and HOME AUTOMATION projects RELAY BOARDS are helpful to connect wide
range of Loads or devices.
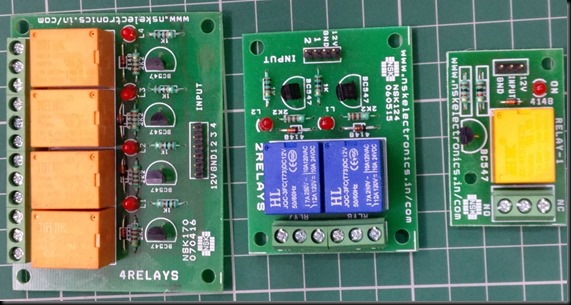
5V Relay boards are available with 1 channel , 2, 4,8 Upto 16 channels .
Each relay is driven by an opto coupler and a NPN transistor.The relay contacts are
provided as Terminal connectors.
Each Relay has a common POLE, a NC –Normally Connected contact and a
NO – Normally Open contact.
These 5V relay boards are LOW ENBLED, meaning , a LOW at input will energize the Relay.
A low at input will make the opto coupler conduct which drives the NPN Transistor.
This in turn will switch ON the relay.
Electronic solid state relay boards are also available which are called SSR.
12v Relay modules also are available.Here the relay is driven by a NPN transistor .12V Modules are HIGH ENABLED ,meaning, a HIGH at input drives the relay ON.
Any load ,DC or AC can be connected to the RELAY contacts, irrespective of the supply voltage to relay board.
The power supply to load is connected to POLE pin and the actual load is connected to the NO pin.
As the relay is energized the pole pin changes from NC to NO ,thus activating the Load.
While using AC load take precaution to insulate properly the wires as well as the Relay boar.Do not touch relay board with AC load.
You can control the devices over Local Area Network or through Cloud or internet.
While using LAN , make sure that the NODEMCU and your mobile , both are connected to the same Router SSID.
For control over internet you need to PORT FORWARD the local ip device port on the router settings.But nowadays a number of IOT PLATFORMS are available as CLOUD. Though you need a paid subscription , most of them offer free service for hobbyists with some limitations.
BLYNK, CAYENNE, THINGSBOARD are some popular IOT PLATFORMS.
Sign in to any of these platforms and start controlling the devices from anywhere in the world.
VIDEO support :


