ATTINY85 , a 8 bit AVR Microcontroller provides many features in lesser pins.
With program memory of 8Kbytes the controller has satisfying memory for many applications.
With various POWER SAVE modes it can work on battery operated applications.
SPECIFICATIONS :
Number of Programmable I/O pins 6 Operating Voltage +2.7 V to +5.5V
Maximum DC Current per I/O Pin 40 mA Maximum DC Current through VCC and GND Pins 200 mA
Communication Interface
Master/Slave SPI Serial Interface (5,6,7 PINS) [Can be used for programming this controller]
I2C or Two-wire Serial Interface (5,7 PINS) [Can be used to connect peripheral devices and sensors]
Universal Serial Interface (5,6,7 PINS) [Can be used for communicating with other controllers]
UART Interface Not available ADC Feature 4channels, 10-bit resolution ADC
Analog Comparators 1 Timer Module 2 x 8-bit counter
PWM outputs 4 External Oscillator 0-20MHz for ATTINY85
Internal Oscillator 0-8MHz Calibrated Internal R-C Oscillator
CPU Speed 1 MIPS @ 1MHz
Program Memory or Flash memory size 8Kbytes
RAM size 512Bytes on Internal SRAM
EEPROM size 512Bytes of In-System Programmable EEPROM
Program Lock Available Watchdog Timer Available
Power Save Modes Three Modes [Idle , ADC Noise Reduction , Power-down ]
ATTINY85 can be programmed in many ways.
This post is on programming in AVR mode .
For programming we need an USBASP (also called AVRDUDE) hardware which is the same one used for programming 8051 ICs.
Connection between ATTINY85 and USBASP is by SPI pins
MOSI to MOSI (pin5)
MISO to MISO (pin 6)
SCK to SCK (pin 7)
RST to RST (PIN 1)
Vcc to pin 8 & Gnd to pin 4 of ATTINY.
For programming we use WINAVR (Programmers Notepad & MFILE)
usbasp driver and winavr can be downloaded from following link.
download link :
http://www.alselectro.com/files/software.zip
After installing driver for usbasp , open the Device Manager to see USBASP under libusb.
Next install WINAVR
Accept default location of installation.
Following components must be selected
ADD Directories to PATH
Install Programmers Notepad
Install WINAVR as ADMINISTRATOR.
Otherwise Programmers Notepad (PN) will not work.
MFile which makes RULE for programming also installed automatically.
In WIN 8 / 10 you need to replace msys.dll file.
Copy the file from the downloaded folder.
Go to C:\WINAVR\utils\bin
and paste.
Confirm Replace file.
Open Programmers Notepad.
Always create a separate folder to save your project files.
Type in the C code to blink LED connected at PB3 (pin 2 ) of ATTINY.
Save the file with .c extension.
Now you have to create the MAKEFILE in the same project folder.
Click on MFile.
Select MCU Type as ATTINY85.
Select PORT as usb
Programmer to be set as usbasp.
But usbasp is not in Programmer list.
Select any one from the Programmer list and then click on ENABLE EDITING.
Change the Programmer as usbasp.
Scroll up to find TARGET.
Rename TARGET to the file name of your project.Here it is ledblink.
Do not use the .c extension here.
Save the file in the same folder where you stored the .c file.
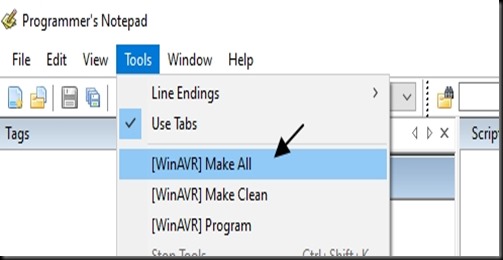
Under Tools —> click Make All
If no error in coding , you get Process Exit Code : 0 and .hex file created in your project folder.
Click on Tools –> Program
The .hex file will be loaded on to the ATTINY successfully.
The LED starts blinking now.
WINAVR can be used to write C file and program using USBASP.
video :


Hi.
Have you this program of prototype sanityzer?
Thanks.
Leandro
Brazil São Paulo
whenever posting about Electronic IC or component, please mention price(INR) and availability in indian market also. It will be very helpful