Tag Archive: GPS


In this post let us explore the GPS Module built on UBLOX Neo series & then parse the data to send SMS with google maps link.

Arduino UNO is used to control the GPS module.

The GPS module used here has provision for connecting an external magnetic patch antenna.This enable the GPS to get FIX  within seconds even while testing indoor.

To test the GPS we need an USB to TTL  module.Or we can use our Arduino itself with a small hack.

Connect the RST pin of Arduino to GND.This will bypass the bootloader of Arduino & we can use the serial IC of Arduino to communicate with GPS.

Connect Tx of GPS to TX of Arduino & Gnd toGnd.

Note that the connection is STRAIGHT here & not reverse .Remember this connection will be reverse while we actually upload code to Arduino & use it in regular mode.

We can power the GPS module from Arduino itself. Connect 5v of Arduino to 5v of GPS.

Wait for some time for the GPS to get FIX. Once a FIX is received a green LED flashes on the GPS board indicating that GPS is ready with data flow.

p1

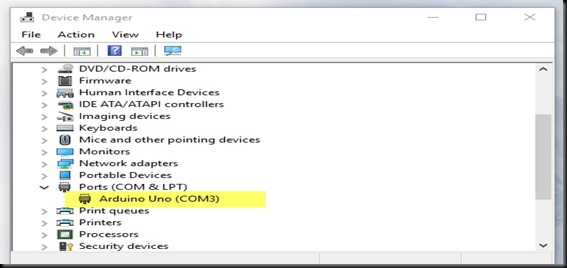
Connect the USB of Arduinot o PC & open the DEVICE MANAGER to note the COM port allotted.

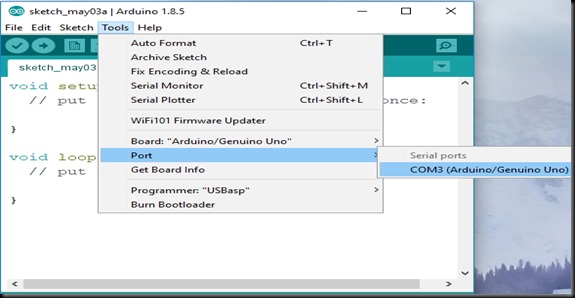
Open the Arduino IDE & select the PORT allotted.

Image 8


Image 9

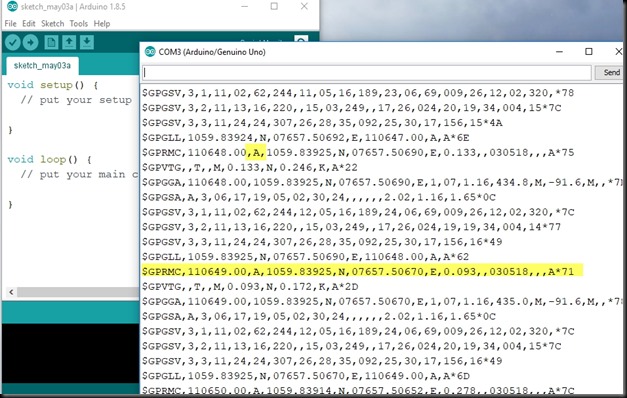
Open the SERIALMONITOR to see the FLOW of NMEA sentences

We’re interested  in GPRMC which is the recommended minimum data for gps

There is an interesting link where we can decode the GPRMC sentence & understand the contents

https://rl.se/gprmc

Copy & paste a GPRMC sentence in this site to decode the contents.

Image3


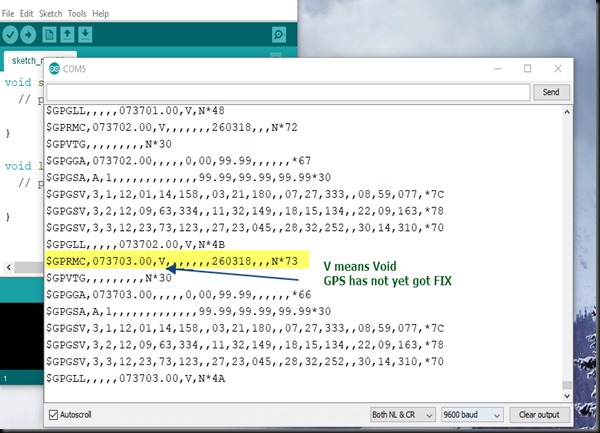
If you notice a V  in GPRMC sentence ,it means GPS has not yet got a FIX. Relocate the antenna & wait for some time to receive a FIX & V changes to A .

Now the RMC sentence has all  the  data latitude,longitude,time,speed,altitude,etc..

Image 4


Image 10


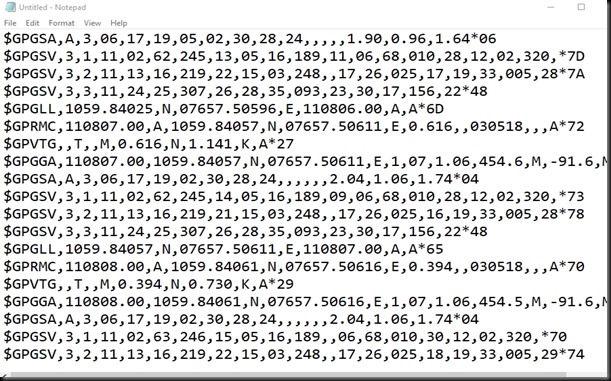
Copy a portion of the data flow & paste it on to a Notepad.

Save it as text file with a name.


Image 11


To visualize the data , go to this link

http://www.gpsvisualizer.com/

Click on Choose file & select the notepad file saved.

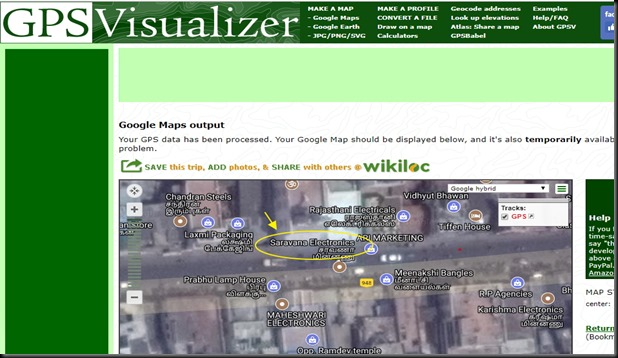
Select the Output Format as GOOGLE MAPS  & click MAPIT.

Image 12

You can see the location on Map.

Image 13


Now your GPS is working.Let us go for a practical demo with Arduino.

To parse the data there are libraries that make life easier.

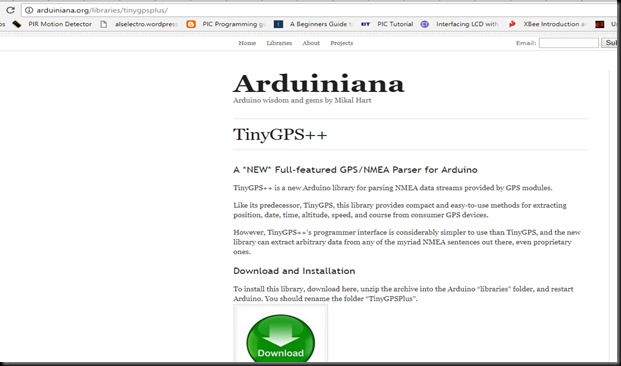
One such library is TINYGPS++ from Arduiniana

http://arduiniana.org/libraries/tinygpsplus/

Download the library ,unzip it.

Image 14

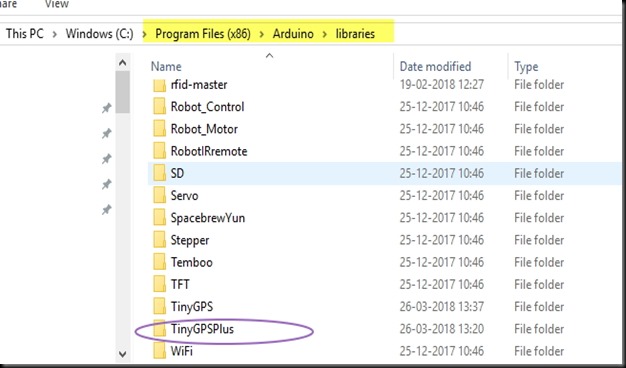
Rename it to TinyGPSPlus & copy paste to Arduino –> Libraries.

Image 15

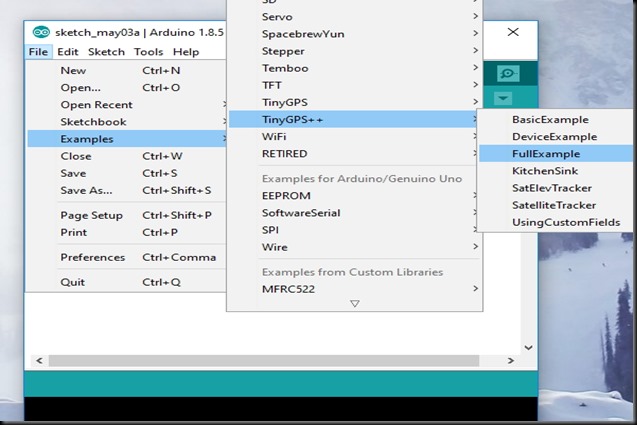
Open the Arduino IDE to see a list of examples against TinyGPS++

Select the FULLEXAMPLE  code.

Image 16

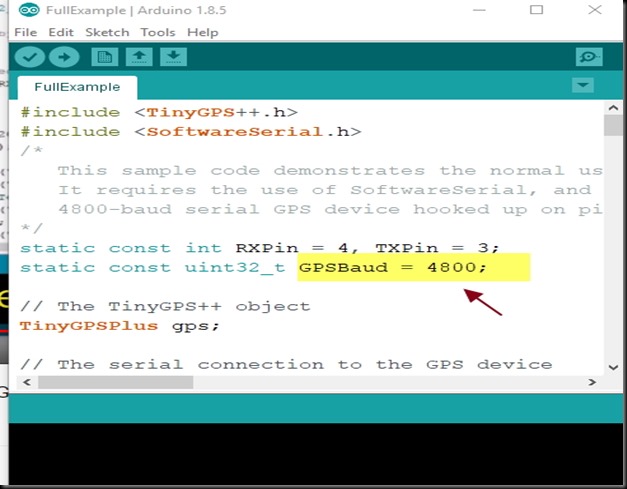
Here Softwareserial is used & digital pins 4 is defined as RX , 3 as Tx

Connect the Tx of GPS to  Rx of Arduino (digital pin 4)

Gnd toGnd.

As we only receive data from GPS , a single connection is enough. Tx of GPS toRx of Arduino

Image 17


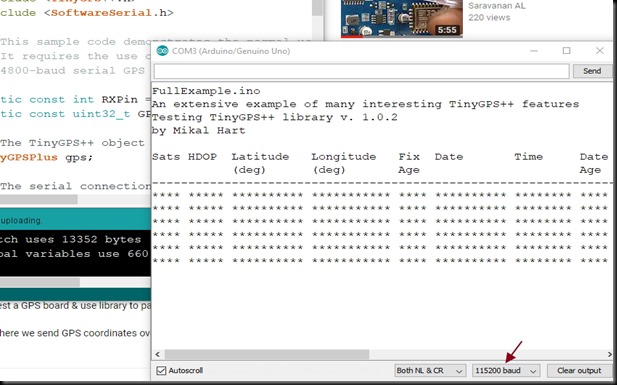
Now upload the code & open the Serial monitor on baud 115200.

No data is received

Image 19

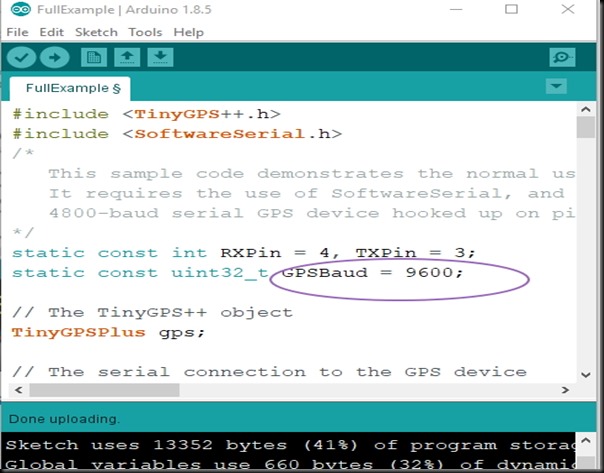
This is because of BAUD RATE mismatch.

Change the GPS Baud (not the serial baud)  to 9600 & then upload.


Image 20


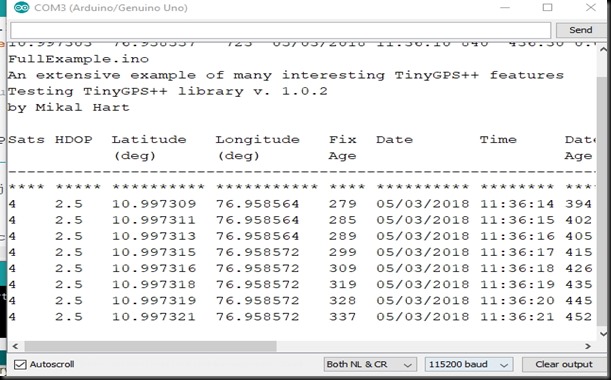
Now you get data which is displayed neatly on serial monitor.

Image 21

In the next example we shall parse the GPS data & send SMS as google maps link using a GSM.

For this we use the previous version of library TINYGPS .

https://github.com/mikalhart/TinyGPS


Image 22

Download the library & install it.

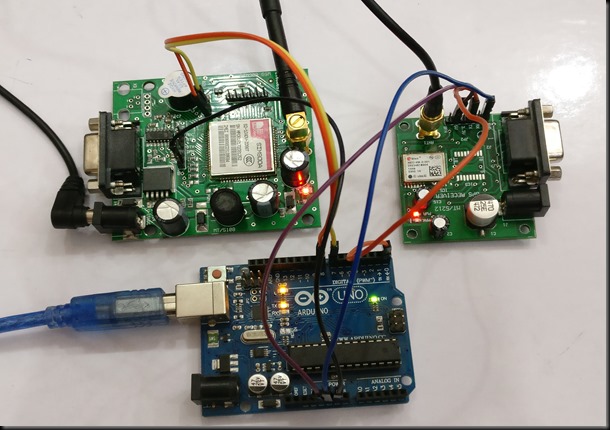
Here we use SIM900 GSM .A separate power source of 12v 1amp is required for GSM.

Connection between Arduino & GPS :


Tx of GPS connected to Rx of Arduino


Gnd to Gnd

5v of Arduino to 5v of GPS.


Connection between Arduino & GSM


Gnd to Gnd

Tx of GSM to Rx (soft serial pin 7) of Arduino

Rx of GSM to Tx (soft serial pin 8) of Arduino


IMG_20180421_162653


Download the code from here

http://www.alselectro.com/files/GPS_GSM.zip


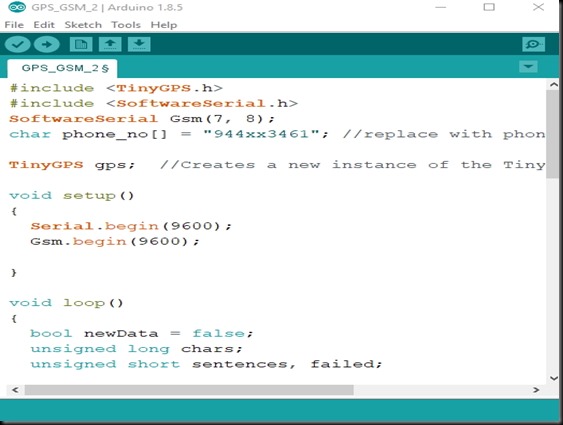
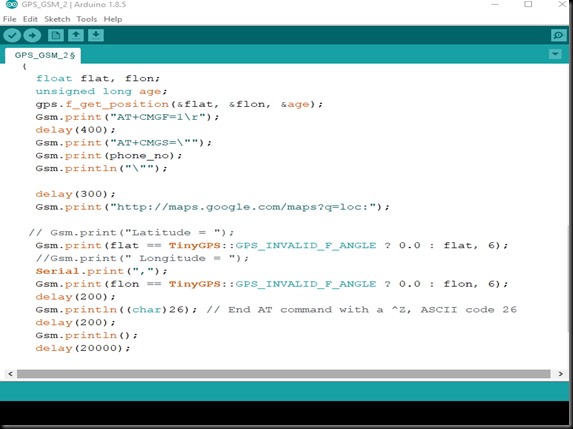
In this code we make use of older version of TINYGPS library to parse the latitude,longitude data,


Image 23

The data parsed is then appended to google maps link&sent as SMS .

Every 20 seconds an SMS is sent.You can modify the code so that you get SMS only when you call to the GSM.


Image 24


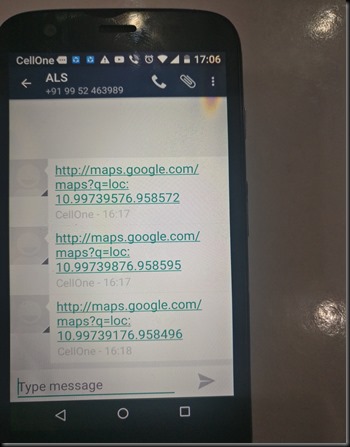
Upload the code & get the SMS on themobile no. you provided in the code.

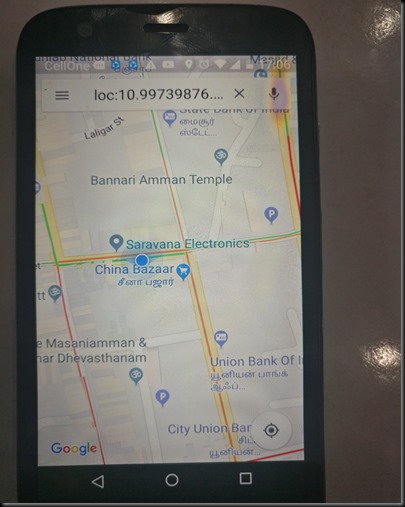
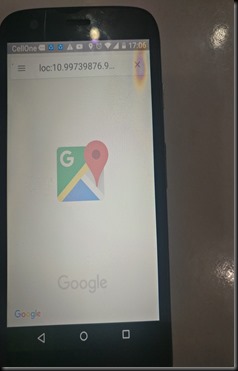
Touch on the SMS link to see the location of GPS.


IMG_20180421_170826         IMG_20180421_170829


IMG_20180421_170845

SUPPORT VIDEO :
 

blog_image.jpg

SIM908 – GSM ,GPRS & GPS All In One

This GPS/GPRS/GSM all-in-one board  uses an embedded SIM908 chip from SIMCOM.

Featuring an industry-standard interface and GPS function, the combination of both technologies allows goods, vehicles and people to be tracked seamlessly at any location and anytime with signal coverage.

Although the module is capable of dual UART , only a single UART   is used in this board.Through AT commands the GPS Engine is switched ON to get the NMEA sentence.GSM is controlled through same UART by AT commands.

Individual Antennas are provided , a STUB Antenna for GSM & an external Magnetic PATCH Antenna for the GPS.The position of Antennas is important , the one near the LM317 regulator is for GSM & the one in middle is for GPS.

sim908_11

The board must  be powered by an external adapter of 12v 1.5amps.Do not try to power this board from your Arduino or any uC board.

The board is best suited for Microcontrollers like 89S52 or PIC16F877A which have only single UART.

With SIM908 you can avail both GSM & GPS on a single UART.

To test the board with PC , we make use of a USB-UART board built on CP2102 Silicon Labs IC .The M908 board is connected to USB-UART board with a STAIGHT type of RS232 cable.

On connecting the USB cable to PC , a COM port is allotted ( which you can note down from the Device Manager) .This port number is used to communicate from PC to SIM9908 using a Terminal Software like PUTTY or HyperTerminal or TERATERM.

In this demo we shall use PUTTY on serial Baud Rate 9600.

Following snapshot shows the setup for testing.Note that the GPS Antenna should be left outside window .GPS gets a FIX immediately only when the Antenna faces SKY directly.Otherwise it takes more time to get a FIX.

STARTUP TESTING

Insert a valid SIM to the SIMHOLDER on the  back of the board.On powering up the SIM908 , the SIGNAL LED blinks fast initially & after short time it stops & then blinks slowly.

This indicates that the NETWORK is received.

Now from your mobile , dial the number of the SIM you’ve inserted on the SIM908 board.You get the Ring Back tone & the RING LED on the board glows.

WP_20150921_002

Note the COM Port allotted under the Device Manager & then open the PUTTY.

Select Serial , feed in the COM Port ( here its COM11) & baud rate as 9600.

Type in AT , the SIM908 module will respond with OK.

AT+CPIN?     returns the SIM STATUS . +CPIN: READY indicates SIM is inserted.

AT+CSQ       returns the SIGNAL QUALITY. 31 is the maximum level.

AT+COPS?    returns the SERVICE PROVIDER of your SIM.

AT+CGSN    gives the IMEI number of the SIM908 module which is Unique to every module.

gsm1

The default BAUD RATE is 9600.

If you wish to change baud , use the command AT+IPR

gsm5

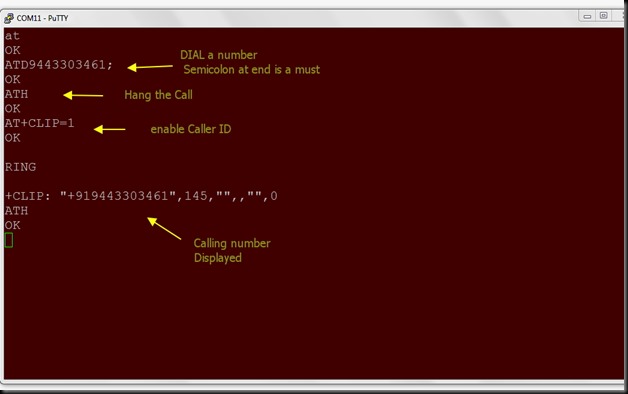
To dial a number

ATD944xxxxx;        ATD followed by the number to be called & then a semicolon ; is a must.

ATH  to terminate the call

If you call the SIM number from another mobile , you get RING , RING  display.

ATA   To attend the call   & ATH to terminate the call.

If you want the caller ID to be displayed

AT+CLIP=1     enables caller ID.

GSM2

To send a message , first enable TEXT MODE ,

AT+CMGF=1

Now assign the target number to which message has to be sent

AT+CMGS=”944xxx”

A >    symbol appears , after which you’ve type the Message to be sent.

CTRL+Z has to be pressed to send the message .  0x1A is  the Hex code used to represent CTRL+Z within your C code.

gsm3

GPS AT COMMANDS

AT+CGPSPWR=1  enables GPS engine

AT+CGPSRST=0    COLD starts GPS.

AT+CGPSINF=0    returns a single NMEA sentence

GPS1

AT+CGPSSTATUS?     indicates whether GPS has got a FIX. If ERROR is the response , then relocate the GPS Antenna , wait for some time & then retry.

gps_3

AT+CGPSINF=32    returns the GPRMC NMEA sentence , from which you can parse the latitude,longitude

Generally the CGPSINF is assigned value  2 ( 2 power 1) to get GPGGA sentence

4  ( 2 power 2 ) to get GPGLL sentence

32 ( 2 power 5) to get GPRMC sentence.

gps_cgp1

gps_cgp2

Widely used value for CGPSINF is 32 which returns the GPRMC Sentence.

In your C code , look out for the value 32 & then count the occurrence of comma .After  second comma is the FIX data ( A means FIX , V means VOID- no fix)  ,after 3rd  comma is the longitude, etc..

GPS2

Watch the Support video for this post :

For availability of this Module contact :

LOGO2

cooltext753793315  cooltext753790696